Black currants are loved for their unpretentiousness, ease of propagation, low cost of planting material and, of course, for the nutritional value of the berries. Harvesting is a pleasure, because the bush has no thorns. At the same time, you can choose a variety to suit every taste, and even a novice gardener can cope with planting. I will tell you in detail from my own experience how to grow fruitful black currants on your plot correctly and without unnecessary hassle.
Planting black currants
Even a schoolchild can cope with planting black currants! The shrub is unpretentious and hardy, the survival rate is high. Therefore, you only need to choose a high-quality seedling, decide on the planting time, prepare the planting hole and follow the rules and planting scheme.
Landing location
When choosing a place for currants, select a suitable area:
- with nutritious soil,
- with a groundwater level no closer than 2 m to the surface,
- without stagnation of moisture,
- Soil pH is about 6.0.
______________________________________________
GROWING BLACKCURRANTS IN SIBERIA

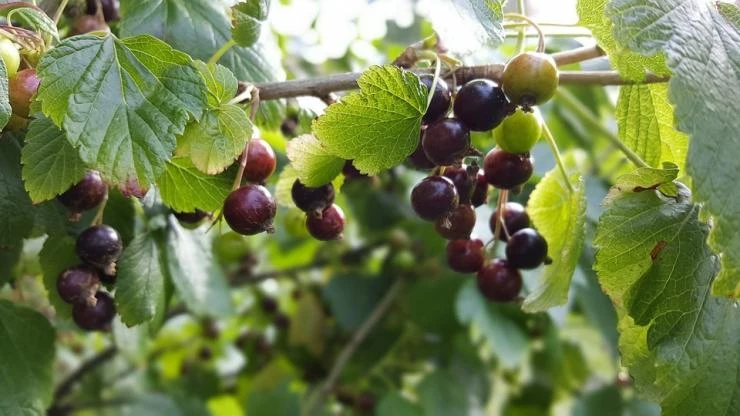
Photo: plant black currants in a fertile area without stagnant water with slightly acidic soil
Landing dates
It is best to plant black currants in the spring – in March or April.
When planting in the spring, it is important to have time to plant the shrub before the currants come to life:
- until the buds and green cone of the future leaf appear,
- before sap flow begins.
If you plant in the fall, you need to be sure that the shrub will have time to take root before severe frosts arrive and a thick snow cap covers the ground.
Seedlings for planting
- When purchasing seedlings, inspect the root system and shoots for integrity.
- It is better to take two-year-olds as seedlings.
- They have already reached half a meter in height, acquired a reliable root system, and developed immunity.
____________________________________________
WHEN AND HOW TO PLANT CURRANTS CORRECTLY

Photo: the best time to plant blackcurrants is spring
Planting hole
Carefully dig up the area for the currants, add 15 kg of humus and 1 tbsp. nitroammophoska per 1 m² of soil. Break up all the clods, level the soil and only then dig the planting hole.
- Immediately place a couple of shovels of expanded clay at the bottom of the hole for drainage.
- The size of the hole should correspond to the volume of the roots of the seedling, so that the roots are not crowded, and they are quietly located in the hole.
Before planting, place 1 tsp in the hole. nitroammophoska and a bucket of humus, pour out a bucket of water. We will place the seedling in this nutritious liquid.
Planting scheme
Plant the bushes so that the plants do not oppress each other in the future.
- If you decide to plant several varieties of black currants on your plot, then maintain a spacing of approximately 2 m between the bushes.
- If you decide to plant several rows, then leave a free space of 3 m between them.
______________________________________________
PLANTING CURRANTS IN THE FAR EAST

Photo: dig a hole to the size of the roots and maintain the distance between the bushes
Landing rules
- We place the seedling in the hole not vertically, but at an angle of 45°.
- Try to ensure that the root collar of the currant bush (the place where the roots enter the trunk) is buried 5 cm into the soil.
- All that remains is to sprinkle all the roots very well and reliably compact the soil so that there are no voids left between the roots.
- Next, each seedling should be watered with a bucket of water.
After planting, we mercilessly remove the entire above-ground part of the seedling with a sharp pruner.
- We leave only parts of the growths with 4 living buds on each.
- To avoid infection with glassware, the tops of the cuts should be immediately painted over with garden paint.

Photo: after planting, water the bush and trim it
Blackcurrant care
Blackcurrant care begins in spring.
- If the bush is young, just planted, the maximum that can be done is to dilute 1 tbsp. nitroammophoska in a bucket of water and pour under each bush.
- If the bush is already several years oldand he has acquired young shoots, then you need to carefully examine them, cut off all the dried and diseased ones to healthy wood, and cover all the cuts with garden paint or garden varnish, slightly heated in your hand.
- Biennial plants More solid feeding is needed. You can use 1.5 tbsp. nitroammophoska on a bucket of water under each bush. Before applying fertilizer, the soil must be thoroughly loosened, all weeds removed, then fertilized and mulched on top, preferably with a 2 cm layer of humus.
Watering
It is better to water with water at room temperature, in the evening, in doses: wait until the water is absorbed and water further.
From the moment the ovary forms and until about mid-summer, currant bushes need to be watered approximately once a week, pouring 3 buckets of water under each plant
- When watering, try not to get it on the leaf blades of the plant. Excess moisture on the leaves is an additional possibility of the occurrence of such an unpleasant disease as powdery mildew.
- Do not forget about watering during the hot summer period – during drought, the watering rate can be doubled. If, on the contrary, the rains are heavy and do not stop at all, then we reduce watering to a minimum.
- After watering, I advise you to mulch: pour about 1 cm of humus, non-acidic peat or just dry soil under the bush.
Top dressing
- In the first half of summer, black currants can be fed with organic matter: 15 kg of humus should be placed under each bush in an even layer.
- During the period when the fruits begin to ripen, it is necessary to apply foliar feeding: mix 6 g of potassium permanganate, 35 g of iron sulfate and 2.5 g of boric acid.
Remember!
These solutions are first diluted in approximately 1 liter of water each, and then each resulting solution is mixed in a bucket of water.
Foliar feeding is usually carried out in the evening and always on a calm, windless evening, preferably cloudy, when the air humidity is high.
______________________________________________
WHAT TO FEED CURRANTS IN SPRING, SUMMER AND AUTUMN

Photo: adult and young blackcurrant bushes require different care
A pinch
Pinching black currants is necessary so that the plant begins to give more energy to the formation of the crop and does not waste it on creating additional above-ground mass
- Around June, you can carefully pinch the ends of annual shoots, literally just a couple of buds.
- In some cases, this technique also stimulates the tillering of the plant – then there will be more harvest.
Loosening and weeding
Don’t forget to remove weeds throughout the season:
- the bite circle must be clean,
- try to get rid of such a malicious weed as wheatgrass,
- Weeds can be removed at a depth of 5 – 30 cm.
Working at maximum depth is dangerous because you can damage the currant roots, but you will destroy rhizomatous weeds such as dandelion.
Weeds are direct competitors of currants and can lead to a sharp decrease in yield
Don’t forget about loosening currant rowsideally they should be constantly loose:
- You can loosen at least every day in your free time, deepening the tip of a hoe or hoe by 10-12 cm.
_____________________________________________
BASIC CARE OF CURRANTS: WATERING, FEEDING, HARVESTING

Photo: pinch out the tops in June, loosen the row spacing and remove weeds in the bush area
Harvesting
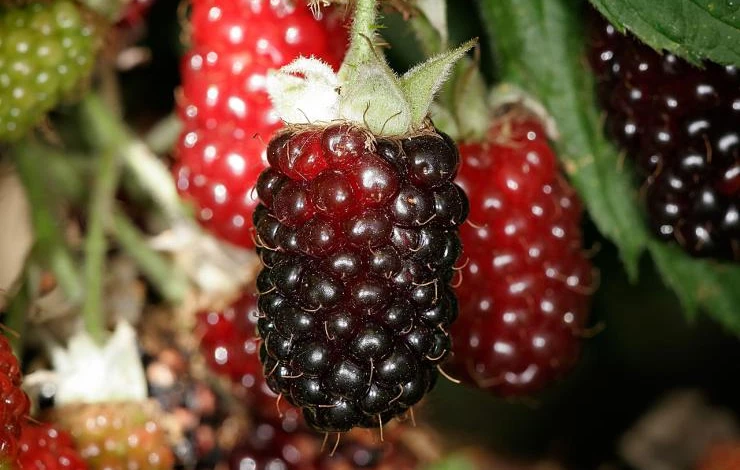
Black currants, unlike red ones, are not collected in whole clusters, but are picked individually, trying to remove only the ripest berries first. Black berries do not ripen at the same time, so the harvest will have to be done in 2-3 doses.
_____________________________________________
MASKS AND INTICTIONS FROM BLACKCURRANT
_____________________________________________
Remember!
During the harvest period, fertilizing and watering should not be done – this can lead to cracking of the berries.
And of course, it is impossible to treat plants with pesticides against diseases and pests during fruiting.
______________________________________________
RECIPE FOR BLACKCURRANT PIE

Photo: during harvesting, do not water or feed blackcurrants
Caring for blackcurrants after harvest
Feeding and watering
After harvesting, you should not start the plants:
- as soon as the harvest is harvested, feed the plants with a solution of potassium sulfate (1 tsp per bucket of water under each bush),
- water: once a week with a bucket of water, and so on until the beginning of November,
- After watering, do not forget to mulch the soil surface.
Trimming
Around November, inspect the shoots again:
- remove broken ones, those that have fallen to the ground, that interfere with others, those growing in the center of the crown, and grease the cut areas with garden varnish or garden paint, which is even better,
- try to maintain the currant bush in such a way that it has an average of 15 mature shoots. The rest can be safely deleted – they are considered unnecessary.
_____________________________________________
HOW TO PRUNCE CURRANTS: RULES, SCHEME AND DATES
_____________________________________________
Preparing for winter
In general, currants are a very winter-hardy crop – they rarely suffer from frost.
- The tops of shoots that grew in August and did not have time to become woody can be pinched and the tips covered with oil paint.
- It is advisable to loosen the soil in the bite area.
- Remove leaf litter and burn.
- Tighten the bush itself with twine so that individual branches do not hang, because in winter they can break under the weight of snow or freezing rain. Do not overdo it so as not to break the shoots and tear off the bark!

Photo: after harvesting, continue to care for blackcurrants
Control of diseases and pests of black currant
There are a lot of pests and diseases on currants. If you planted a high-quality seedling in an area where currants had not grown before, they will not appear very soon, if at all.
The most common diseases on currants are:
- terryness,
- gray rot (usually with high humidity – try to simply reduce watering),
- powdery mildew (also occurs as a result of either prolonged rains and fogs or excessive watering).
____________________________________________
HOW TO FIGHT APHIES ON CURRANTS
____________________________________________
Among the insects that harm black currants are:
- spider mite (sucks juice from leaf blades),
- kidney mite (lives directly in the buds, which is why they swell, turning into balls, and do not bloom at all)
- fruit sawfly,
- glassware (caterpillar living right in the center of the shoot),
- flamethrower.
____________________________________________
TREATING CURRANTS WITH BOILING WATER IN SPRING FROM BUD MITE

When processing with approved chemicals, it is important to know:
- no treatments can be carried out a month before harvesting,
- fungicides must be used against fungal diseases,
- against ticks – acaricides,
- against insect pests – insecticides.
Folk remedies for diseases and pests are used for prevention:
- in the spring, even before the buds open, currant bushes are watered with water at a temperature of about 80 °C at the rate of 3 liters for each plant,
- remove affected shoots and leaves in a timely manner, burn them outside the site,
- cut off and burn buds affected by bud mites,
- Before the buds open, the bushes can be sprayed with a 1-2% solution of Bordeaux mixture, killing the fungal infection.
_____________________________________________
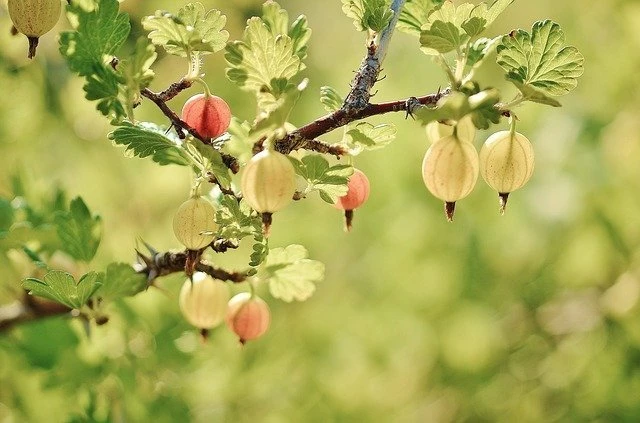
DISEASES AND PESTS OF CURRANTS AND GOOSEBERRY

Photo: preventive treatments and proper agricultural technology will protect black currants
Propagation of black currant
Black currant is one of the few crops that is extremely easy to propagate and in a variety of ways:
- slice lignified cuttings as long and thick as a pencil and stick into the soil in September, and each will form a new bush.
- root green June cuttings in the greenhouse, watering them more often.
- cover the bush with earth, leaving only one crown, then all shoots will form adventitious rootsand the shoots can be separated and planted as independent plants,
- or propagate horizontal layers: spread the shoots radially over the surface of the soil, and sprinkle them with 1 cm thick soil. From each bud, a shoot will begin to grow upward, and roots will begin to grow downward. All that remains to do in the fall is to separate such shoots, divide them into parts with roots and plant them around the site.